前言
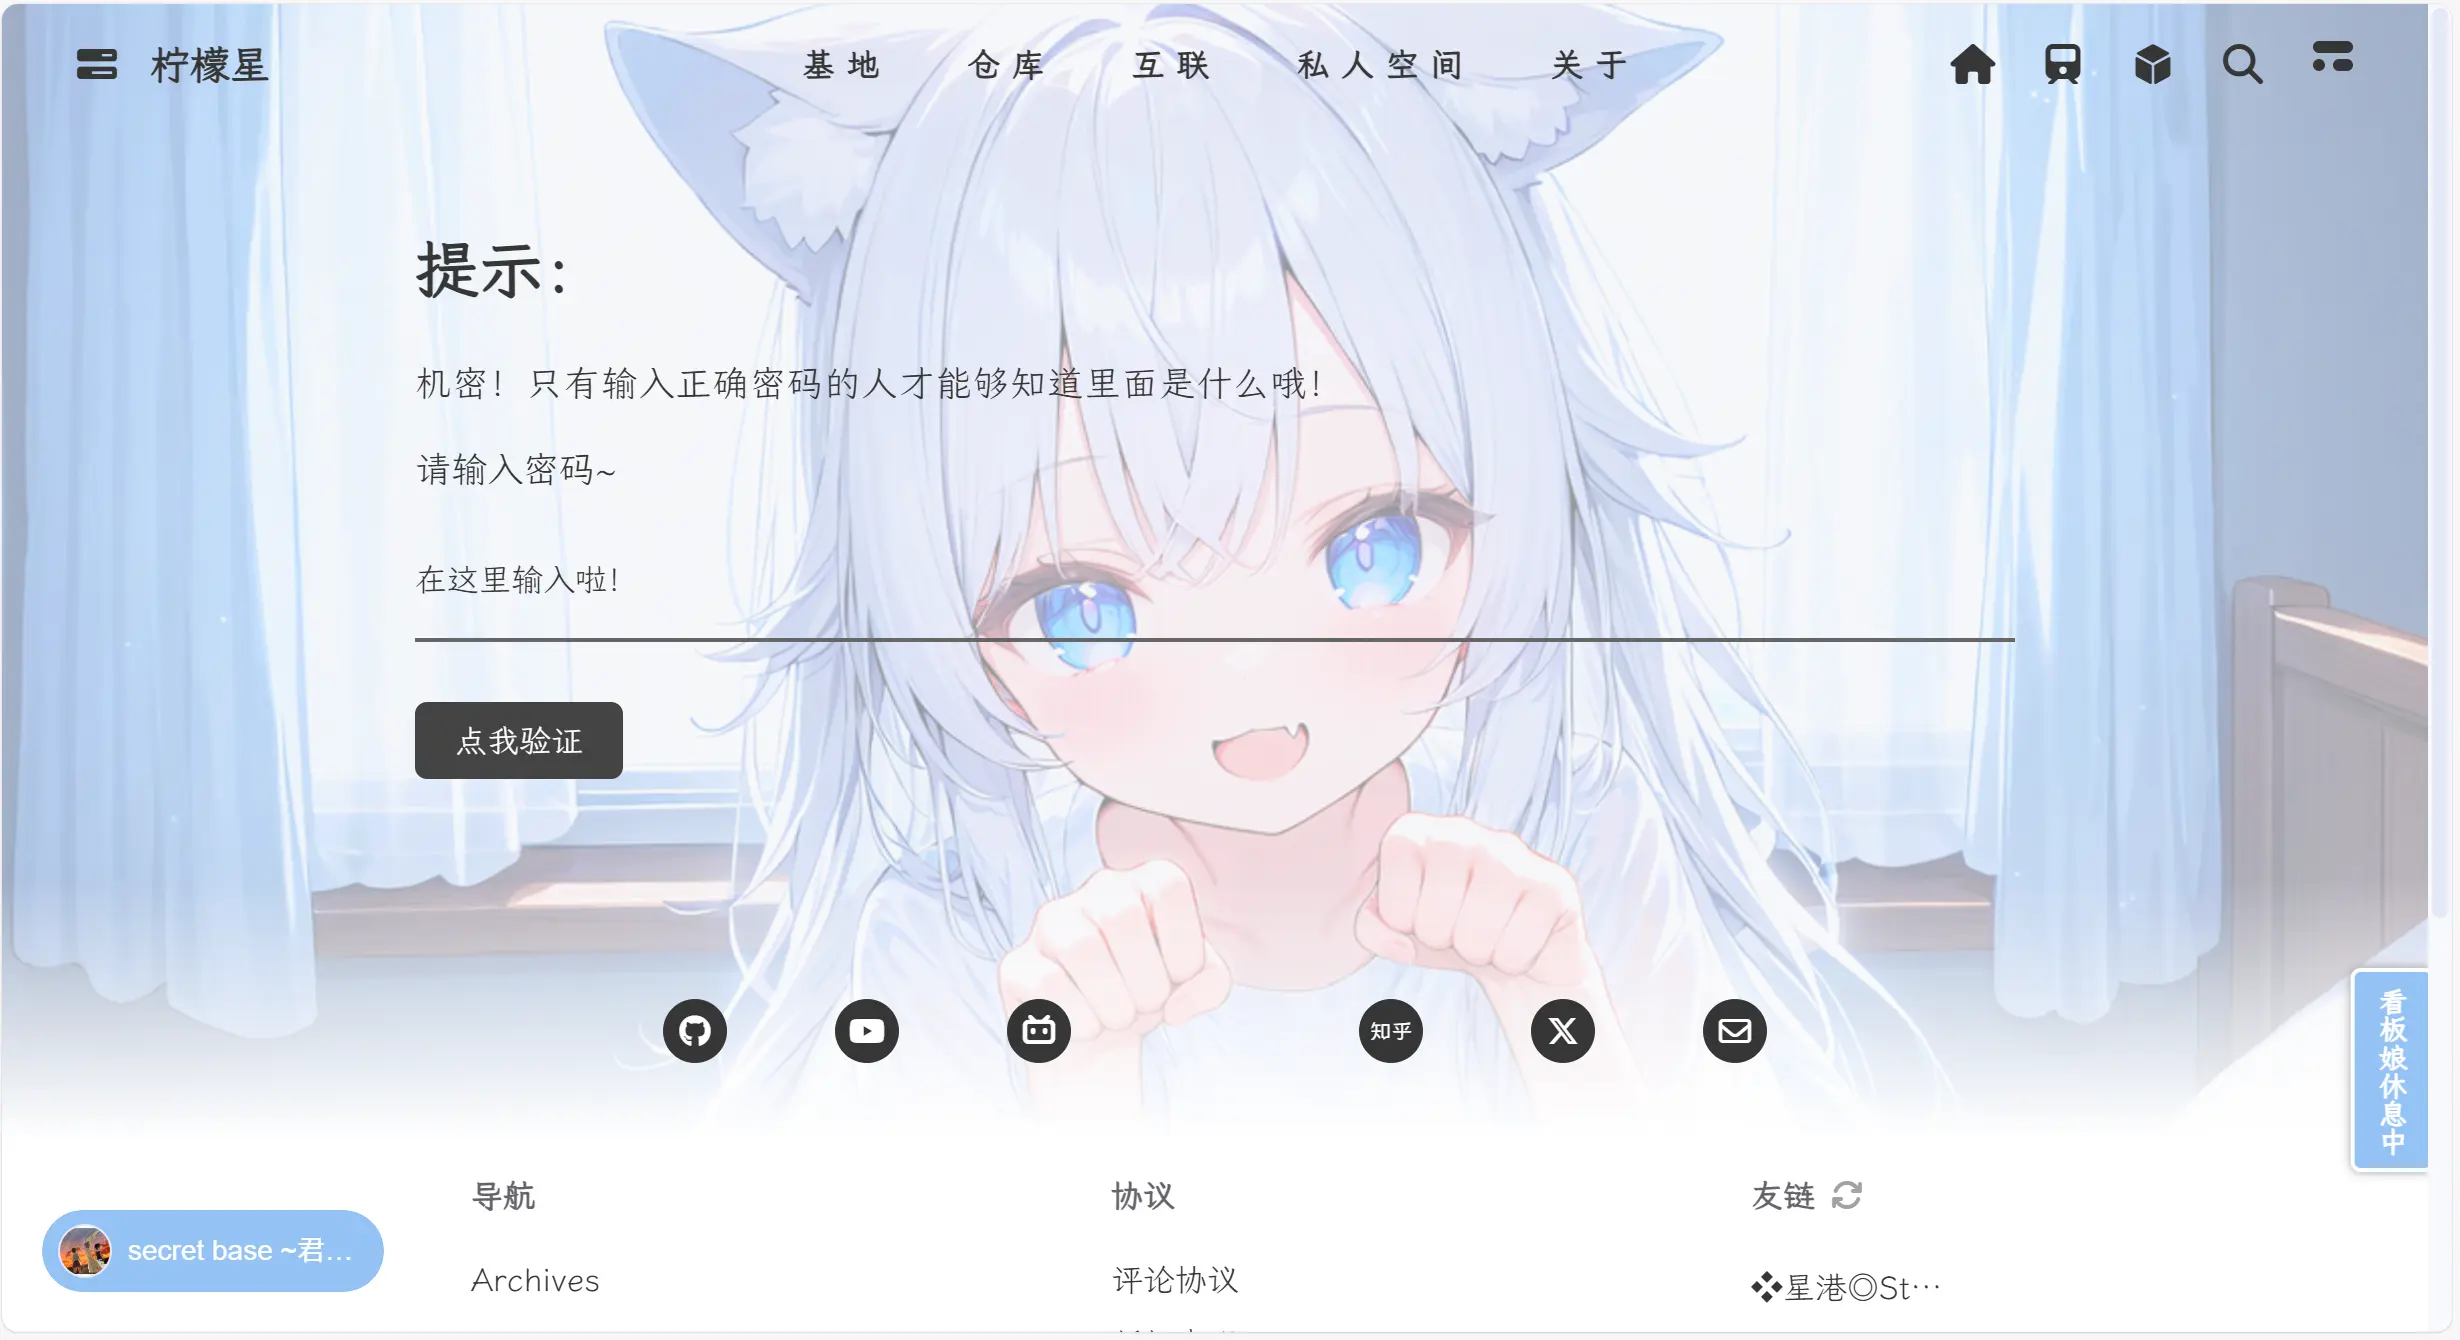
今天在叶泯希哥哥的博客里闲逛的时候发现了他有个这个页面:

我第一眼看到这个密码条就心动了你知道吗,想起来我的博客也有一个要密码保护的页面,还用的是在地址栏输密码的模式……
于是我打开 F12,想抄作业,但是…… Hexo 自动生成的这个 html 是啥啊,是给人看的吗
哦对哦它好像本来就不是给人看的……
突然想起来 Markdown 文件里面是能放 html 的,欸,这不就有了吗?
于是经过我的一番搜索,加上 ChatGPT 帮我写的 css,终于给我的博客也弄上了一个,当当当当!

OK,话不多说,开始发车!
原理
就是利用html的表单功能,没输密码的时候显示这个,密码输对了显示那个,再加上一段 JavaScript 判断密码输没输对,还有一段 css 设置样式,其实如果不讲究的话css都可以不要也能实现的(原文就没加),反正挺简单的
css/js
在你的自定义css/js文件夹里面新增两个文件:password.css&password.js,里面放入以下代码(注意,不要引入到配置文件,避免样式冲突):
1
2
3
4
5
6
7
8
9
10
11
12
13
14
15
16
17
18
19
20
21
22
23
24
25
26
27
28
29
30
31
32
33
34
35
36
37
38
39
40
41
42
43
44
| form {
max-width: 800px;
margin: 40px auto;
text-align: left;
}
label {
display: block;
margin-bottom: 8px;
font-size: 18px;
color: #333;
}
.password-input {
border: none;
border-bottom: 2px solid #666;
background: transparent;
outline: none;
font-size: 16px;
padding: 20px 0;
width: 100%;
margin-bottom: 20px;
color: #333;
}
.password-input:focus {
border-bottom: 2px solid #000;
}
.btn {
display: inline-block;
padding: 10px 20px;
margin-top: 10px;
background: #444;
color: #fff;
border: none;
border-radius: 6px;
cursor: pointer;
transition: 0.3s;
}
.btn:hover {
background: #222;
}
|
1
2
3
4
5
6
7
8
9
10
11
12
13
14
15
16
17
18
19
20
21
22
23
24
25
26
27
28
| document.getElementById("passwordForm").addEventListener("submit", function(event) {
event.preventDefault();
var password = document.getElementById("password").value;
if (password === "yourpassword") {
document.getElementById("content").style.display = "block";
document.getElementById("passwordForm").style.display = "none";
} else {
alert("密码不对哦~ 不知道别来捣乱!");
}
});
|
把if (password === "yourpassword")里面的yourpassword改成你的密码。
html
新建一个页面(hexo n xxx),放入以下代码:
1
2
3
4
5
6
7
8
9
10
11
12
13
14
15
16
17
18
19
20
21
22
23
24
25
| <body>
<form id="passwordForm">
<h1>提示:</h1>
<p>机密!只有输入正确密码的人才能够知道里面是什么哦!</p>
<form id="passwordForm">
<label for="password">请输入密码~</label>
<input type="password" id="password" name="password" class="password-input" placeholder="在这里输入啦!">
<button class="btn" type="submit"><span>点我验证</span></button>
</form>
<div id="content" style="display:none;">
<div class='gallery-group-main'>
</div>
</div>
<link rel="stylesheet" href="/custom/css/password.css">
<script src="/custom/js/password.js"></script>
</body>
|
在<div id="content" style="display:none;">和<div class='gallery-group-main'>中间放入你想要在输入正确密码后显示的东西(用 html 或者 Markdown 都行)
当然也不一定必须要在单独的页面显示啦!放在文章里也行的。
示例
密码:123456(输错有惊喜哦!)
恭喜你,密码正确!
要看看在页面上的示例吗?(这次可不告诉你密码了哦!)
1
2
3
4
5
6
7
8
9
10
11
12
13
14
15
16
17
18
19
20
21
22
23
24
25
26
27
28
29
30
31
32
33
34
35
36
37
38
39
40
41
42
43
44
45
46
47
48
49
50
51
52
53
54
55
| <body>
<form id="passwordForm">
<label for="password">请输入密码~</label>
<input type="password" id="password" name="password" class="password-input" placeholder="在这里输入啦!">
<button class="btn" type="submit"><span>点我验证</span></button>
</form>
<div id="content" style="display:none;">
# 恭喜你,密码正确!
要看看在页面上的示例吗?(这次可不告诉你密码了哦!)
{% link '不公开的页面/文章','柠檬星','https://blog.lemonstar.me/notpublic' %}
<div class='gallery-group-main'>
</div>
</div>
<link rel="stylesheet" href="/custom/css/password.css">
<script>document.getElementById("passwordForm").addEventListener("submit", function(event) {
event.preventDefault();
var password = document.getElementById("password").value;
if (password === "123456") {
document.getElementById("content").style.display = "block";
document.getElementById("passwordForm").style.display = "none";
} else {
alert("都告诉你密码了你还输错?(被我骗到了吧)");
}
});
</script>
</body>
|
提示
由于这种方式的密码都是写在代码里面的,别人很容易就能知道,所以不推荐用这种方法隐藏一些很重要的东西,用来玩玩就行了
结语
OK 那这次心血来潮的更新就到这里啦,这还是我第一次自己魔改 Solitude 呢(虽然代码都不是我写的啦),也算是第一次自力更生给博客加了个小功能,没看教程什么的,我还挺喜欢的,那过几天再见!
参考


